Tuesday, March 19, 2013

Gooseberry Mesa (White Trail to South Rim Trail loop)

March 18, 2013

The weather was supposed to be perfect for a desert hike today and with the day off from work, Liz and I decided that a hike was in order. Gooseberry Mesa is famous for it's mountain biking trails, although an occasional hiker will use them as well.

We left our home in Hurricane, Utah a little after 9:30 in the morning and caught hwy 59 that goes out to Colorado City (also known as 100 south in Hurricane). The highway immediately climbs up the Hurricane cliffs. 13.7 miles after getting on hwy 59, the turnoff to Gooseberry Mesa is on the left side of the road. It is a signed dirt road. The road is, for the most part, well maintained. We took my Pathfinder just in case there were some sketchy parts that my accord would have trouble with. I am very glad I had it because there were 2 or 3 parts of the road - close to the trail head - that would have required creative maneuvering of a low clearance vehicle. I will also note that if it has rained in the two or three days prior to this hike, the roads would probably be impassible for just about any vehicle.

Gooseberry Mesa Trail head and parking area
After driving 2.8 miles on the Gooseberry road, there is a marked junction, indicating that Gooseberry Mesa is to the left. Accordingly, we turned left as the sign said, crossing a cattle guard. This is the road that is a little washed out in spots. About 3 miles after making our left turn, we crossed another unmarked cattle guard, and after 3.5 miles from the turn off (6.3 from hwy 59) we came to the Gooseberry Trail head, restroom, and parking area. Another sign indicated that the White Trail head, which is the trail we planned to take, was a little further ahead and off to the left. So we headed off to the left, as indicated by the sign, but not long after, the road forked and there was no sign indicating which way to go. By luck, we decided to take the right fork, which is the correct way. After 1.1 miles from the Gooseberry Trail head sign, we came to another sign and parking area indicating the start of the White trail head. We also noticed a small sign and gap in the fence marking the start of the South Rim trail. We parked, got our gear together, and started on our hike at 10:19am.

White Trail head and parking area
The temperature was about 50 degrees when we started, with a little breeze and it was cool enough to make me rethink my decision to wear shorts and short sleeves. The White Trail is a well used bike trail, that small mechanized vehicles, such as 4-wheelers, can take as we found out on our hike. The trail isn't very scenic at first, as it meanders through a desert landscape. But after about 3 miles, the trail takes you to some spectacular views off of the north rim of the mesa. From here we could see the little town of Virgin, off of hwy 9 on the way to Zion National Park, as well as some of the land marks from the National Park its self.

View off the North Rim
The junction with the South Rim Trail was soon after the view point, and we followed the South Rim trail further west to the end of the trail - a rock peninsula with drop offs of a few hundred feet on 3 sides. We stopped and took in the amazing views and snapped a few photos before continuing back on the South Rim trail. I will say here that we lost the actual trail in spots here and did a little bit of scrambling to reach the view point at the end of the trail, but we were able to follow it on the way back. It was at this point of our hike that we encountered the first of the dozen or so mountain bikers we saw today.

View off the South Rim
When we reached the junction of the White and South Rim trails, we took the South Rim trail back. Again, we lost the trail a couple of times, but I remembered from looking at maps that the South Rim trail stayed pretty close to the South Rim its self, so when we lost it, we just headed for the south cliff band and managed to find it again. Because the trail stayed along the south rim, the views were great looking down at the highway that we drove in on and toward the former Kokopeli Golf Course. The South Rim trail negotiates a lot of rock. In spots where the trail goes over rock, the trail is marked with white dots of paint, which are very easy to spot and follow.

At one point, about 2 miles from the end of the hike, the South Rim trail gets with in yards of the White Trail, before heading back to the south east. If you're tired, this would be a good way to cut about a mile off of the total hike distance. But if you choose to stay on the South Rim trail, as we did, you will be presented with a nice walk through juniper trees and other pines, quite different from the other parts of the trail.

We made it back to our vehicle after 9.7 miles and 3 hours and 42 minutes of hiking. The trail was a very easy trail as far as elevation gain/loss is concerned. The trail head started at just under 5200 feet and the view point at the end of the hike is just over 5400 feet. Other info: The White trail is 3.1 miles long and the South Rim trail, about 5.9 miles long. You will do a short back track on the South Rim trail to get to the view point.
The junction of the White and South Rim trails
 

Friday, January 25, 2013

Falling Man (Whitney-Hartman petroglyph site)


Jan 17, 2013

The weather was just turning warm enough for a hike, and with the destination being in the Mesquite, Nevada area where the temperature is a couple of degrees warmer than where we live, it was time to check out some petroglyphs. I had read a newspaper article about the Falling Man site, as the Whitney-Hartman site is commonly referred to, a week or so before the hike and used the directions in it to find my way.

We took I-15 south out of St George, Utah and followed it 5 miles past Mesquite to exit 112, which is the Riverside/Bunkerville exit. Once off the freeway, we took a left at the stop sign and headed towards Bunkerville. After about 3 miles, the road/minor highway crosses the Virgin River and immediately past the bridge crossing the river is an intersection which is unmarked, unless I just missed the sign. Regardless, the road is Gold Butte Road. Take a right onto Gold Butte Road and continue on this paved, yet rough and not well maintained, road for another 20 miles. After about a mile on the road, you'll come to a melon farm; after about 10 miles you'll see someones residence which looks like an oasis; after 14 miles you'll see Lake Mead off in the distance ahead of you, which makes for a awesome view; and finally at 19.9 miles the turn off will be on the right hand side.
The Black Butte Road turn off with the red rock formation in the background

The road is called Black Butte Road, although it is not marked. The best way to be on the look out for it is to just remember that when you see a giant red rock formation directly ahead of you, take the small, unassuming dirt road off to the right which will, again, be 19.9 miles from when you started on Gold Butte Road. This is a rough single track dirt road. I made it in my Honda Accord with some creative driving, but I would definitely recommend a high clearance vehicle.
The parking area.

After 1.2 miles on the dirt road it forks. Take the left fork and continue another .7 miles to the parking area surrounded by a wooden fence. Although the road continues through the fenced area, park at the fenced area and look for a small break in the fence just wide enough for a hiker to get through.

Crawling through the window to get to the Falling Man petroglyph.
The trail is easy to follow at first as it leads you past a number of small rock formations. We explored a few of them and found some minor petroglyphs. To get to the Falling Man petroglyph, continue straight on the main trail until it seemingly ends in a cul-de-sac fashion. From here, if you veer slightly to the right, you'll pick up a faint trail that heads in the direction of a large rock outcropping. As you get closer to the outcropping, if you look closely you can see some more petroglyphs, and a window through the rock to the other side. Scramble up to the window and crawl through, as the Falling Man is just a hundred feet or so through it.


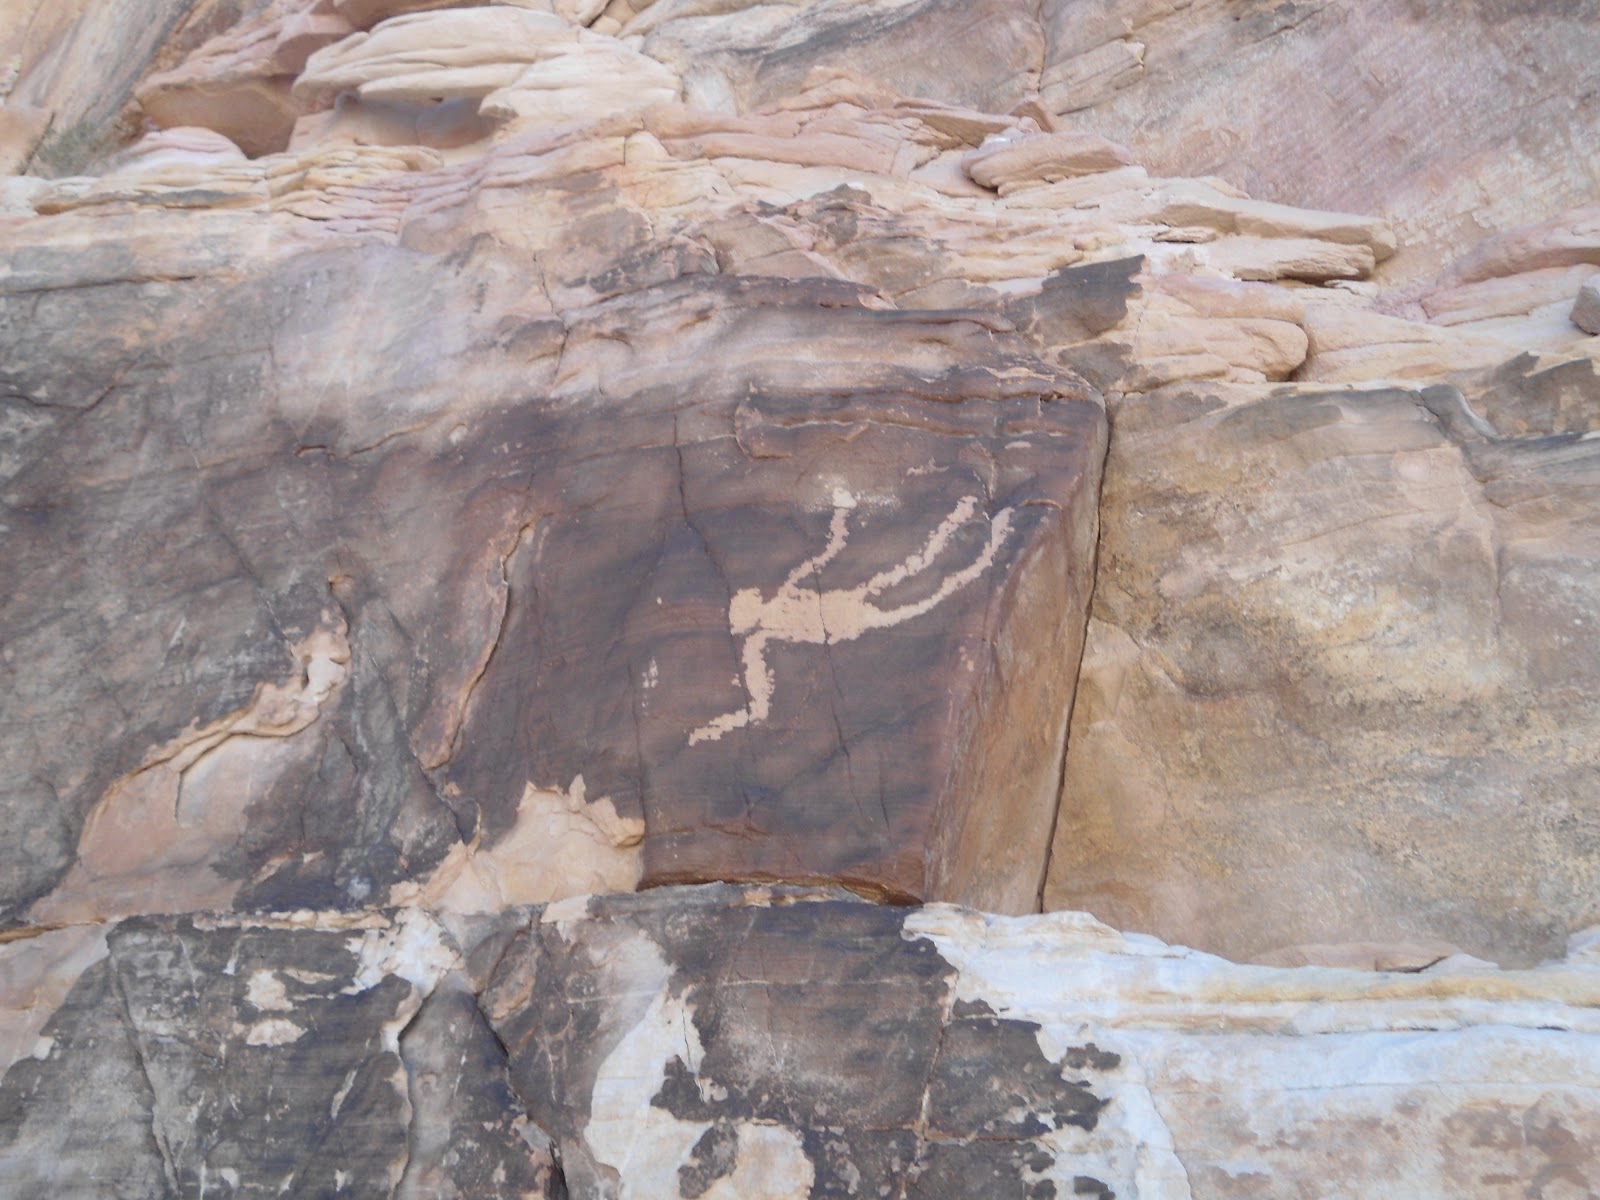
Falling Man
Once through the window, follow the narrow ledge to the left and see if you can spot the Falling Man petroglyph about 8 feet up on the wall by the ledge that you're on. It's not extremely large - maybe about a foot or so long - but it is very distinct. There are no other petroglyphs in the immediate area surrounding the Falling Man, but if you continue scrambling down for a few hundred yards and then head left up a small side canyon, you'll find the best panel of petroglyphs in the area. They are high up on the rock ledge - actually there are 3 different levels of the ledge that they're on. We found a way to hike up to them all.

There are probably plenty of petroglyphs that we missed, but we were happy to see what we did. Part of the fun of being there was just imagining how the early people used to live in the very area that we were exploring. We tried to imagine what plants they lived off of, what animals they ate, where they slept, etc. It was a great experience. Our total hiking distance was minimal - maybe 2 miles at most, with a little easy scrambling/climbing that just about anyone could do.
This is where it gets hard to figure out where to go. I'm at the portion of the main trail that seemingly ends in a cul-de-sac fashion. In the picture, I am pointing the way to go to get to the window.

The faint trail that leads up to the window that you have to pass through to see Falling Man and the main panel of petroglyphs.

Climbing up to get to the main panel of petroglyphs.

The lower level of petroglyphs.

Me at the first (lower) level of petroglyphs.

Second level of petroglyphs.

Liz at the second level of petroglyphs.
The third level of petroglyphs, higher up on the wall.

Let the exploring begin!

Exploring on the top of the rock formation.

A picture of what the trail looks like just after passing through the gap in the fence.


Thursday, November 15, 2012

Coalpits Wash

15 Nov 2012

With the weather warm enough for me to attempt a longer hike, I thought I'd give Coalpits wash an attempt. I had wanted to do Coalpits for some time to check out the oil ruins left from a failed drilling attempt many years ago.

The trail head is located just across the bridge spanning the small Coalpits wash, just on the east side of the bridge. The bridge is signed, and there is a small parking area on the north side of the highway. A NPS fence leads to a wooden hikers gate and a trail sign.

I started on my way 5 minutes before 9:00. With the temperature in the 40's, my hands were freezing and I would look forward to the section of trail that was exposed to the sun. I thought about how I would be thinking the exact opposite had I been attempting this hike in the middle of summer!

The well-defined trail was covered with leaves from the overhead trees. After about a half mile, the trail crosses two small but steep ravines and wanders under power lines. A third small ravine is crossed and a small post sign is passed indicating that I was entering the Zion Wilderness area.

Campsite 6. This is where you leave the trail and head across the wash on the left.
After 1.75 miles, I came to the confluence of Scoggins and Coalpits washes. The first time I attempted this hike about 4 months ago, I ventured to the right, following the main trail. Unfortunately, a few miles later, I realized that this was Scoggins Wash that I had followed. The confluence is marked with a campsite marker, number 6. When you come to this marker, cut across the wash and head up the wash on the left where the bigger water flow is coming from.

Round, prickly balls of death that kept attaching themselves to my socks.
From here, the views of Cougar Mountain ahead shortly open up and it seems like an insermountable task to get there. But that's where the trail takes you - until it curves right along it's south wall. At this point there are a couple of options.There isn't much of a trail so you can make your way up the river itself, which would be slow going, or try to find the faint game trails up on the benches. For the most part, I followed deer tracks since I figured they would probably know the easiest way through the brush. I ended up stopping what seemed like every 50 steps to pull round prickly balls of death out of my socks. (Yes, the name I gave them is a little overly dramatic but, after a while, it was a pain in the behind to pull them out of my socks. I would get pricked in my ankles about 10 times before I finally cried 'uncle' and stopped to pull them out, only to get pricked in each finger as I pulled them out).

When the trail brought me back to the river, some of the pools were frozen over and in some spots, heavy frost lined the river bank. There were many small picturesque waterfalls along the way as well. After about 3.5 miles, the wash turns into a mini canyon of sorts with rock walls enclosing the river course. I hadn't gotten my feet wet yet, so I bushwhacked my way onto the rim, just about 30 feet above the river, and made my way around the narrow reed filled river that way. Since coming back from my hike, I've heard that "coalpits spring" is found coming out of the rock in this short portion of the hike and that it results in a mini hanging gardens. Next time I will have to hike up the river to check it out.
The cairn marking the Chinle Trail junction.
Just past this part, and 3.8 miles from the trail head, the Chinle Trail comes in from the right. It is well marked by a large cairn on the river bank and another large cairn and small post sign off the river.

The next interesting landmark that I was supposed to come to (5.5 miles from the trail head) was the oil ruins. I was expecting to see something like the cable works at Cable Mountain, but on my way up the wash, I actually missed the ruins.

The falls before the hanging gardens.
I continued up the wash and after 7.9 miles came to some really pretty falls that winded around beneath some spectacular hanging gardens. Just past the hanging gardens was another waterfall preceded by a small pool. To get up the waterfall (about 6 feet tall) I had to get my feet wet for the first time before climbing up the mossy rocks.

I made it up and quickly came to another 6 foot waterfall that I bypassed by climbing up the wall on the right. After 8.2 miles I came to a fork in the wash. Since I left my map at my house, I wasn't sure which one was Coalpits. Water flowed from both forks. I decided to follow the one on the right, which had less water flowing from it. With time running out to make it back to a dinner appointment, I knew I wouldn't have much longer to explore. I went up the wash for a few hundred yards and it looked as though the wash was extremely overgrown with brush, so I decided to turn around. (Upon looking at my map when I got home, I realized that Coalpits actually was the the one on the left and ended not much farther up stream).

Oil Ruins
The way back was long and my legs were showing the effects of not having been on a long hike for a couple of months. I did, however, manage to spot the oil ruins on the east side of the river, up on a bench about 15 feet above the river. They were neat to see, but again, not what I was expecting.

I got back to the car about 4:15 after 16.5 miles. The trail admittedly isn't as scenic as most of the hikes I have been on, but it did have it's interesting points. Doing this hike in the summer would be brutally hot and the fall proved to have it's downside as well with all the burrs and bristles falling off their plants and easily finding my socks. Spring would seem to be the best time to do this hike.
One of the many falls on the hike.

My hiking stick on a frozen pool.

Looking north towards Cougar Mountain.

A portion of Coalpits wash near the junction with the Chinle Trail.

A picture of the partially frozen river.

The falls before the hanging gardens.
A close up of the hanging gardens.


The first 6 foot fall. To get passed it, I climbed up the rocks just to the right of the water fall.
The second 6 foot fall. To get passed this I climbed a thin ledge on the rock to the right.

At the end of my hike. I took the right fork for a few hundred yards although Coalpits Wash continues on the left fork.

 
Another picture of the oil ruins.
 

Thursday, November 1, 2012

Confluence Trail to La Verkin Creek Trail to Chub Trace to Tortoise Track to Confluence View Trails, Confluence Park

Nov 1, 2012

With a little of Confluence Park explored last week, Liz and I thought we'd explore a bit more of it this week. The Park its self has 10 different trails in it and Liz and I would be covering five of them on this hike. We took two cars and parked one of them (our pick up car) at the Main Street Trail head in Hurricane. To get there, follow main street north from SR-9 in Hurricane until it ends in an undeveloped neighborhood at a trail head marker. The marker here is an historical marker of the early exploration of the Hurricane area by Parley P Pratt.
Parking area and trail head
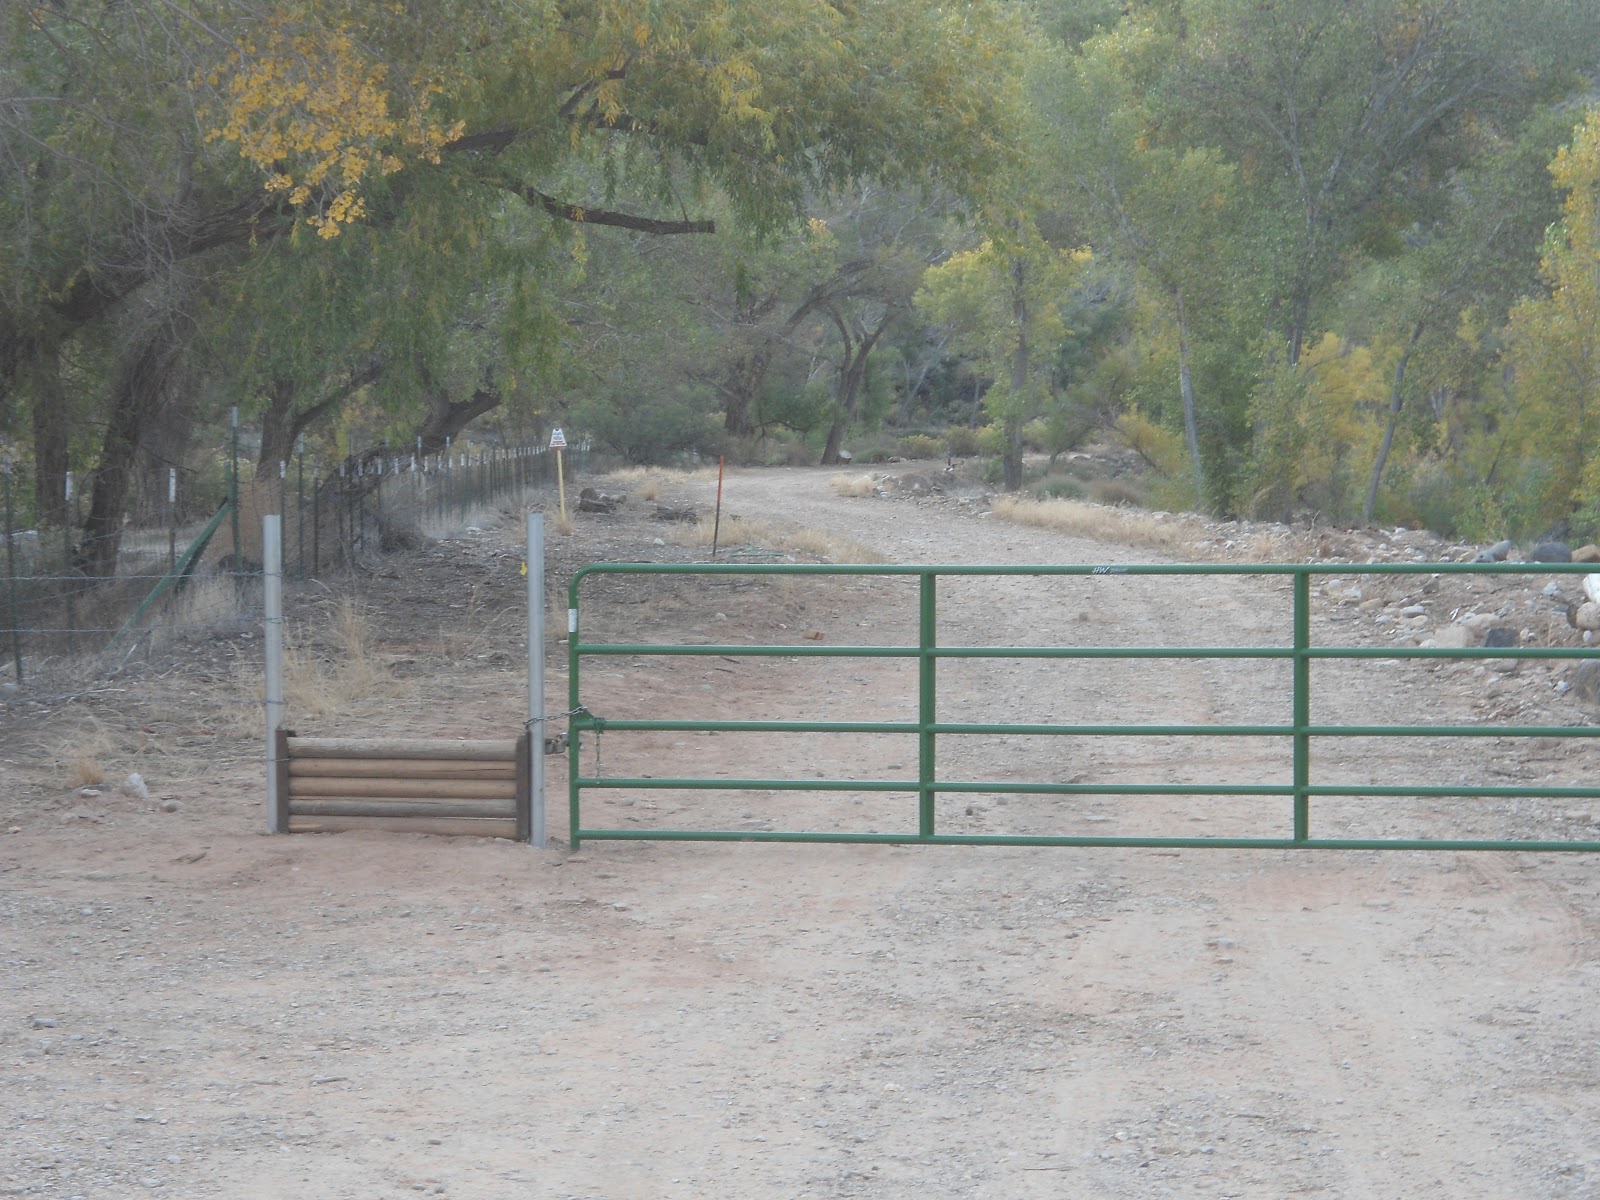
Once we parked our car at the Main Street trail head, we headed to 900 North in LaVerkin, took a left, and then followed the signs to the newly developed trail head. At the trail head there are restrooms and a large sign with a map of all the trails as well as a little history on the area. The Trail head is large and the trail starts at the far end, following a dirt road. A large green gate blocks the way for motorized vehicles, but a little hikers pass allows hikers access to the trail/road.

The main dirt road is Confluence Trail. We took this road for about a third of a mile until we came to a sign post indicating that the La Verkin Creek Trail went off to the right. The La Verkin Creek trail starts out as a pretty well worn hiking trail as it takes you to the confluence of La Verkin Creek and the Virgin River. From this point though, the trail disappears and for a time we even contemplated crossing the river at this spot. Instead, we decided to follow the river bank upstream and ended up periodically finding what appeared to be faint game trails. We followed them, parallel to the Virgin River until we could see the road that we started out on (Confluence Trail). We walked back to Confluence Trail and noticed that back to the left there was an old building. We decided to back track a bit to check it out. It was the old Historic Dairy Barn. We checked it our for a little bit, then turned back around and continued on our way. About a quarter mile past the Dairy Barn, we came to the Anasazi Cave Overhang. At this point, the Cactus Cliff trail joins the Confluence Trail and the junction is signed.

Grain storage site with volcanic outcropping to the right
The next landmark we came to was the Historic Grain Storage Site, about a quarter mile past the Anasazi Cave. The granary stored grain for the turkey farm. This was the coolest part of the hike. Just off to the side of the storage site is a really cool volcanic rock formation that we spent about 30 minutes exploring.

Hydroelectric Power plant
Past the Grain Storage site, the trail continues on the river bank for about another third of a mile until you get to the Hydroelectric Power station. This power station was built in 1929 and was in operation until 1983. It was another highlight of the hike.

After checking out the old power plant, we decided to ford the river and find "Chub Trace" a .6 mile trail that would take us back to Tortoise Track, the trail that leads to our car. The current of the river was strong in spots and the water was cold, but we made it across without incident. We then bushwhacked our way for a short time until we came to the trail we were looking for, which was pretty faint.

We came to the junction with the Tortoise Track, took a left and started up the hill until we came to the Confluence View Trail which is where our car was parked.

Because we are familiar with the area, we had no problem navigating our way back to where we needed to go, even in the absence of a trail in spots. But for the most part, the trails are pretty easy to follow, especially the Confluence Trail and the Tortoise Track, which are actually jeep roads. In total, the hike was about 3.5 miles.

This is how different points of the trails were signed
Liz is in the center of the volcanic rock "fort"
Liz, making her way through a fissure in the volcanic rock
The granary from above (on the volcanic rock)

The sign at the trail head
The gate at the trail head