The Trans-Zion hike is the best way to experience the magnificent scenery that all of Zion National Park has to offer in a long, strenuous 37+ mile hike. The hike starts at the Lee Pass Trailhead in the Kolob Canyons section of Zion National Park and ends at the Grotto Trailhead in Zion National Park. Numerous different trails are used for the trek, each well marked with signs and well defined.
Here is some basic information about each trail used (using the Lava Point Campground):
Day 1
LaVerkin Creek Trail: 6.7 miles, Start Elevation 5919, End Elevation 5352, Gain/Loss -567 feet.
Hop Valley Trail: 6.3 miles, Start Elevation 5352, End Elevation 6355, Gain/Loss +1003 feet.
Connector Trail: 3.8 miles, Start Elevation 6355, End Elevation 6920, Gain/Loss +565 feet.
Wildcat Canyon Trail: 4.8 miles, Start Elevation 6920, End Elevation 7520, Gain/Loss +600 feet.
Lava Point Road: .7 miles, Start Elevation 7520, End Elevation 7633, Gain/Loss +113 feet.
Barney's Trail: .3 miles, Start Elevation 7633, End Elevation 7850, Gain/Loss +217 feet.
Totals: 10 hours 19 minutes, 22.6 miles, Start Elevation 5919, End Elevation 7850, Gain/Loss +1931 feet. *Please be aware that there is far more elevation gain/loss than this, as each trail gains and loses elevation.
Day 2
Barney's Trail: .3 miles, Start Elevation 7850, End Elevation 7633, Gain/Loss -217 feet.
Lava Point Road: .7 miles, Start Elevation 7633, End Elevation 7520, Gain/Loss -113 feet.
West Rim Trail (Via Telephone Canyon): 13.6 miles, Start Elevation 7520, End Elevation 4297, Gain/Loss -3223 feet.
Totals: 5 hours 30 minutes, 14.6 miles, Start Elevation 7850, End Elevation 4297, Gain/Loss -3553 feet. *Please be aware that, while not as drastic as Day 1, there is still more total elevation gain/loss than reported here as each trail gains and looses elevation.
Camping
There are also many campsites along the way to camp in. The only campsite not requiring a permit and fees is the
Lava Point Campground, which is the one I decided to use.
More information about the Lava Point Campground can be found by clicking the link above but, briefly, here are some of the pros and cons of using Lava Point:
Pros: The major advantages are that there is no need to obtain a back country permit from Zion National Park for the hike or to camp and that there are no fees involved. There are also amenities at Lava Point that you won't find at the back country camping sites such as vault toilets, a fire pit, trash receptacles, and a picnic table.
Cons: The Lava Point Campground is located 1 mile off of the Trans-Zion trail which equals 2 total miles added to your total hike (getting there and back). Also, it is located 22.6 miles from the starting point of your hike which makes for an extremely long first day. Finally, it is also about 330 feet above the West Rim Trailhead, meaning that not only do you have to walk an extra mile to get to the campground, but you also have to gain an additional 330 feet of elevation after you've already hiked over 20 miles for the day.
There are 17 numbered campsites along the LaVerkin Creek Trail (not ideal if you are planning on doing the hike in 2 days since they are so close to the beginning - only 2-8 miles from the trailhead).
There are 3 horse campsites along the Hop Valley Trail (again, still very close to the beginning of the hike - about 9-10 miles from the trailhead)
Lava Point is the next campsite, 22.6 miles from the trailhead.
There are 9 campsites along the West Rim Trail, in reverse order. Campsite 9 is about 22.5 miles from the trailhead (about the same distance away as Lava Point). It requires you to leave the West Rim Trail for about .3 of a mile to get to the campsite. This would probably be the next best option if doing the hike in 2 days but would require a back country permit. Campsites 8 and 7 are about another 4 miles down the West Rim Trail.
The Hike in Pictures:
 |
| Here's a look at the sign indicating the Lee Pass Trailhead. I didn't clock it but I would guess it's about 4 miles from the Visitor's Center up the Kolob Canyons Road. |
 |
| This is a better look at the parking area. There is plenty of room. The Trailhead starts back down hill to the North of the parking area (behind me in this picture). |
 |
| The actual trailhead. |
 |
| The information board which unfortunately turned out slightly blurry in this picture. |
 |
| The trail starts off by descending at a pretty quick pace which was frustrating because I knew I was going to have to gain back all the elevation that I was now losing... |
 |
| Through this meadow area, I could see many spots where deer had bedded down for the night. |
 |
| Campsite #1 is 2.45 miles from the trailhead at an elevation of 5437 feet. |
 |
| Campsite #2 is 3.1 miles from the trailhead at an elevation of 5361 feet. |
 |
| Past campsite #2, the trail ascends slightly up a drainage. |
 |
| Campsite #3 is 4.1 miles from the trailhead at an elevation of 5448 feet. |
 |
| Campsite #4 is 4.5 miles from the trailhead at an elevation of 5091 feet. Although visible from the trail, it looked like a nice campsite and was the first that was close to the LaVerkin Creek. |
 |
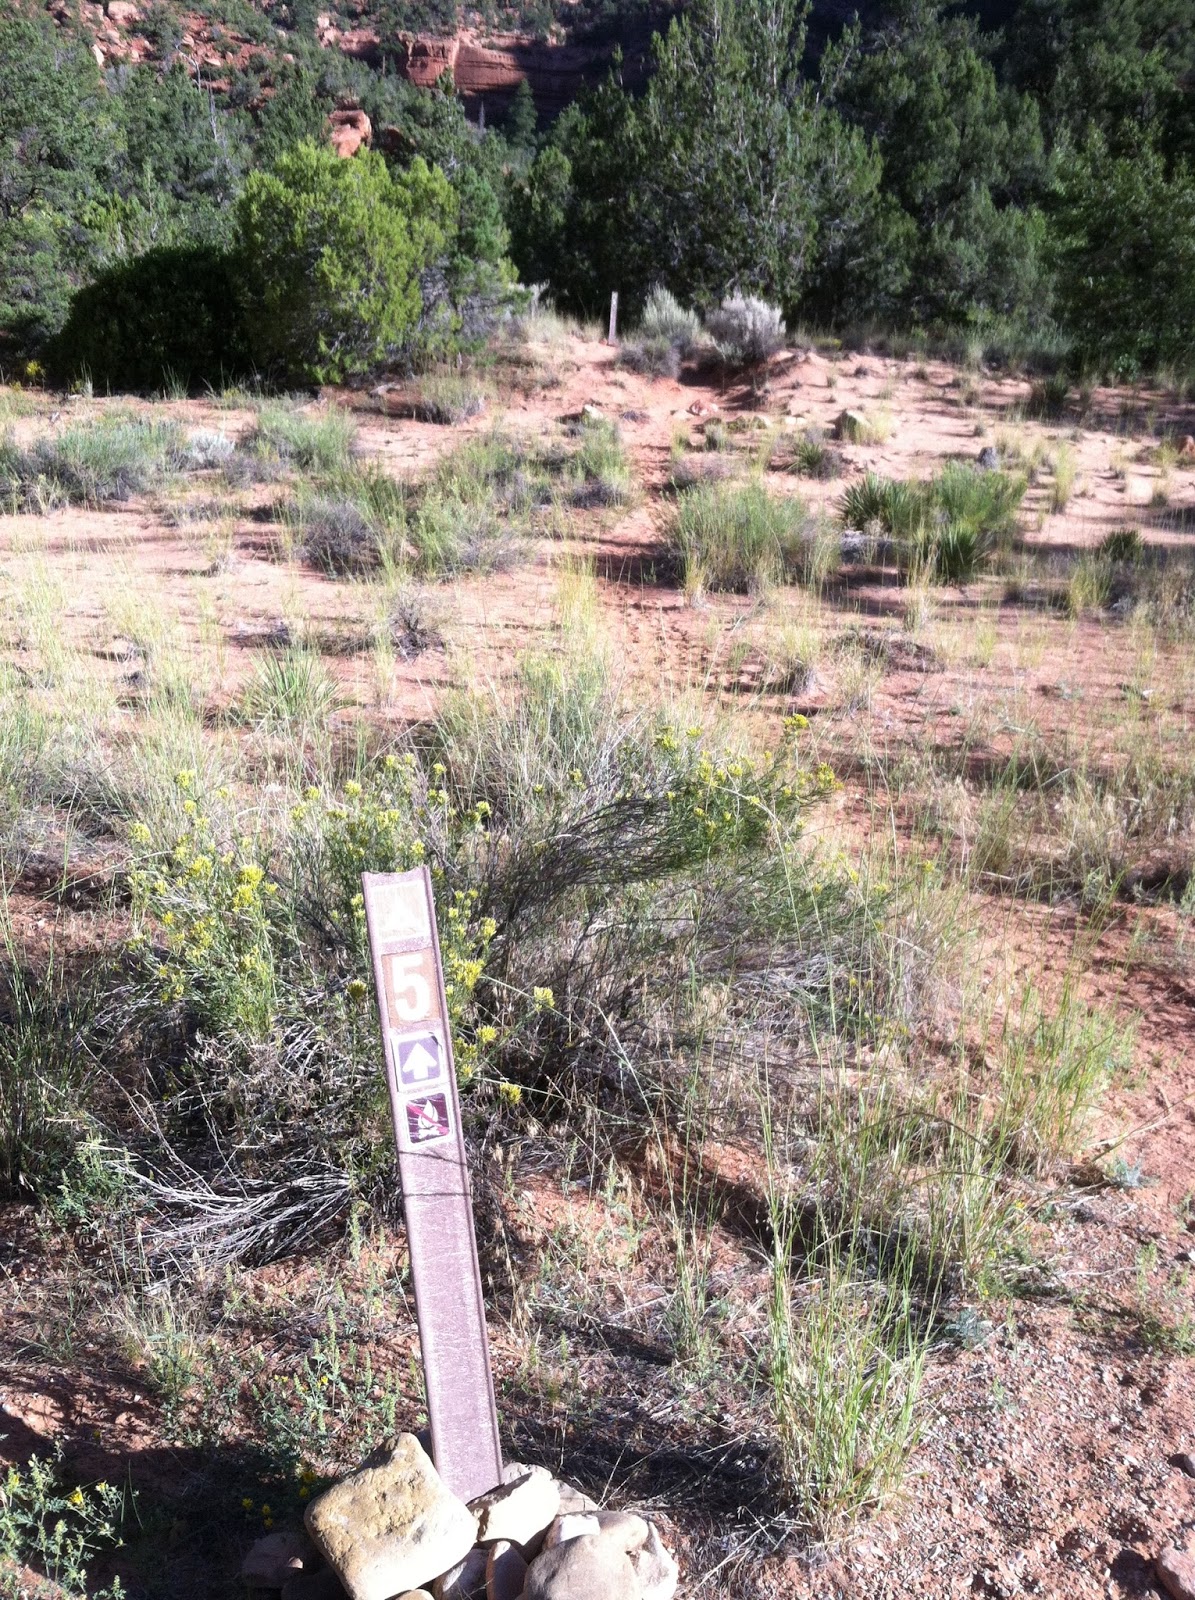
| Campsite #5 is 4.8 miles from the trailhead at an elevation of 5115 feet. |
 |
| Campsite #6 is 5 miles from the trailhead at an elevation of 5124 feet. To get to it, you have to cross the creek. |
 |
| Here's a look at Gregory Butte to the north of campsite #6. |
 |
| Campsite #7 is 5.3 miles from the trailhead at an elevation of 5252 feet. I didn't get a picture of campsite's 8 and 9 because people were camping there. The campsites are right across the creek from each other and not much past campsite 7. |
 |
| Not far past campsite 9 the trail crosses a small creek. |
 |
| The Kolob Arch trail then comes in from the North. It adds a total of 3 miles to an already long hike so I decided not to do it. Back in 2010 when I did the Trans-Zion hike I went to see the arch. It's said to be the 2nd longest free standing arch in the world to Landscape Arch in Arches National Park. To view the arch, it's best to try in the afternoon because of the lighting. When I saw it in 2010, the glare from the sun made the Arch hard to see (you don't actually hike to the arch, just to a viewpoint of the arch. |
 |
| Here's a look at the Kolob Arch trail. |
 |
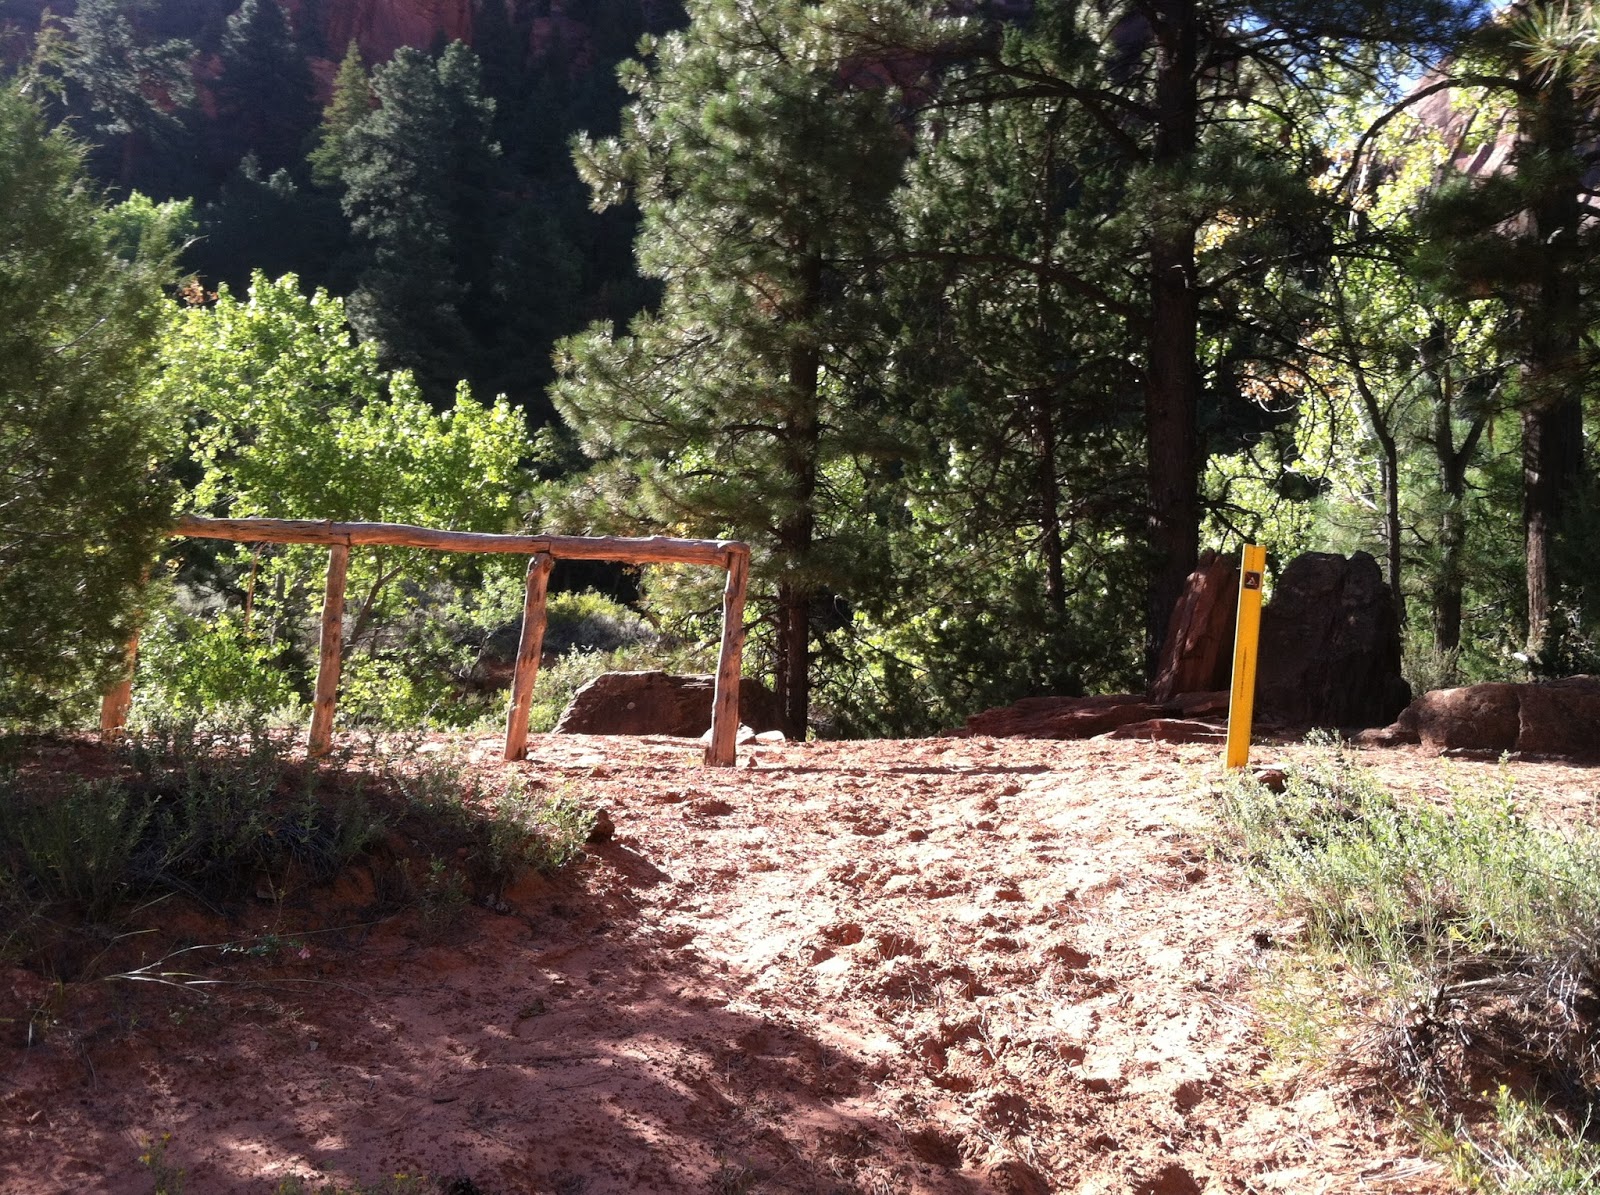
| Because the Kolob Arch trail is closed to horses, there is a tie-off place just opposite where the trail begins. |
 |
| Campsite #10 is 5.8 miles from the trailhead at an elevation of 5262 feet. I didn't get pictures of any of the other campsites along the LaVerkin Creek Trail. |
 |
| Before intersecting the Hop Valley Trail, the LaVerkin Creek Trail crosses LaVerkin Creek. |
 |
| Here's the sign indicating the junction of he Hop Valley Trail. The Hop Valley Trail was easily the most physically demanding of all the trails. It begins ascending immediately. In fact, you gain about 400 vertical feet in elevation in the first half mile. |
 |
| Here's a look back at the sign as seen from the Hop Valley Trail heading back to Lee Pass. |
 |
| The view during the initial ascent on the Hop Valley Trail. |
 |
| At one point, the Hop Valley Trail enters a small chute-like area as it ascends. |
 |
| Much of the ascent involves a wide trail with protruding rocks and roots. |
 |
| After the first half mile or so, the trail starts it's descent into Hop Valley. You can barely see Hop Valley off in the distance in the center of this picture. |
 |
| Getting closer... |
 |
| ...and I made it! The views of Hop Valley are actually stunning. The first time I did this hike in 2010 I was not expecting this and the beauty of the terrain caught me off guard! |
 |
| The trail as it enters Hop Valley is very sandy. Much of the trail through the valley is difficult to walk through due to sand, mud, and a few shallow creek crossings. |
 |
| Here's a look back up canyon when you first enter the valley. |
 |
| And here's a look down canyon - the direction you'll be heading for the next couple of miles. |
 |
| A sign indicates the way to Campsites A and B, both of which are off to the left (east) side of the trail. They are about 9 miles from the Lee Pass Trailhead at an elevation of 5692 feet. (No, that's not a space slug at the top of the picture...I had to put my hand above the camera to help with the glare of the sun). |
 |
| At first, the trail hugs the eastern side of Hop Valley as it winds through pine trees en route to a cattle fence. |
 |
| Here's a look at Campsite B, I believe, from the trail. |
 |
| The cattle gate is about .2 miles past the campsites. It is here because from this point on, you cross over private property about 4 or 5 times. The land owners graze their cattle through the Valley. |
 |
| Once the trail comes to the river it disappears for a short time but just follows the river down canyon for a couple of miles. If you just continue down canyon you'll pick up the trail again in a hundred yards or so. |
 |
| Here's a look at one of the many signs you'll see indicating that you are entering private property. |
 |
| As I mentioned, the trail will be easy to pick up again once a little further down canyon. |
 |
| Here's another section of the trail as it winds it's way through Hop Valley. In this section it seemed that with every step I took, a handful of grasshoppers would fly into the air. This is about the portion of the trail where I saw a small snake in 2010. |
 |
| This is the point where the trail exits Hop Valley and starts ascending what I like to call "the hill of death" on the right (west) side of the canyon. It really isn't that bad, but after I've been hiking for about 11 miles, my feet and legs feel the elevation gain of this part of the hike. It begins at an elevation of 5855 feet. |
 |
| A look back down into Hop Valley (to the north) as I'm part way through the ascent of the hill of death. |
 |
| Most of the ascent of the hill of death takes place on a wide, rocky dirt road. |
 |
| After you've ascended about 300 vertical feet, a nice bench has been placed on the right (west) side of the trail as a memorial for Corey Ray Buxton. It was a nice place to sit for a while in the shade and take a water break while I let my legs rest. |
 |
| A look at the scenery along this portion of the hike. |
 |
| I wish this picture had turned out better...It looked as though the plant in the foreground was giving me "the finger." That's what I felt the whole Hop Valley trail was giving me with the elevation gain, then loss, then gain again, and with the sandy and rocky trail conditions...it was definitely the most physically demanding trail on the hike. |
 |
| The Hop Valley Trail as it nears the junction with the Connector Trail... |
 |
| ...but first it passes through the 2nd cattle gate at an elevation of 6303 feet... |
 |
| ...and heads through some sage brush as it makes it's way toward the Kolob Reservoir Road. |
 |
| Before coming to the Kolob Reservoir Road, you come to this sign. Even though it doesn't say anything about the "Connector Trail," that is the trail you will be on for the next 4 miles until you get to the Wildcat Trail. |
 |
| Here's a look at the connector trail just past the sign and just before the road crossing. |
 |
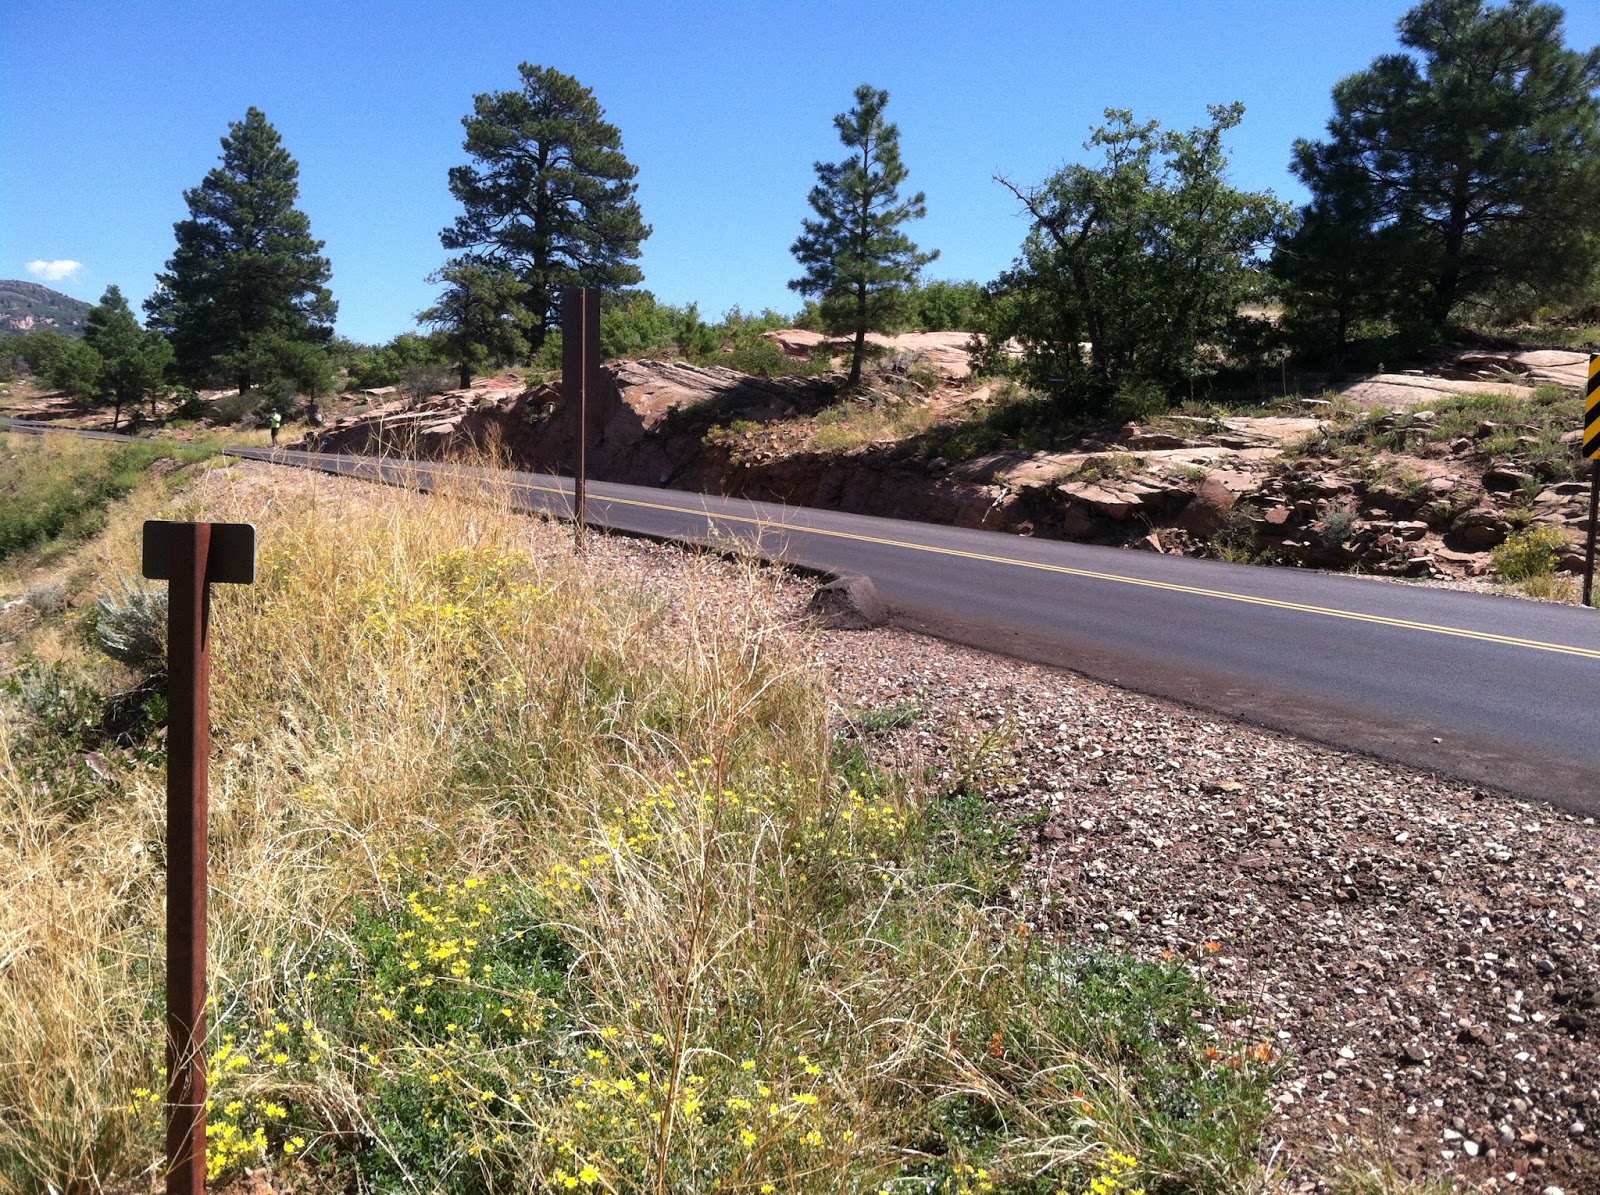
| This is the point where the trail crosses the Kolob Reservoir Road. By this point you will have been hiking for 13.4 miles. |
 |
| Here's the sign across the road indicating the continuation of the Connector Trail. A fun story here - just as I had crossed the road, I spotted my wife and 2 year old daughter who were driving down the Kolob Reservoir Road. My wife had decided to go to the Lava Point Campground a little early to set up our tent to make sure we got a spot. It's a good thing she did because she ended up securing the last spot. Had she waited to go up until our kids were out of school, we would have been out of luck! Anyway, she stopped and I went over and gave her and my 2 year old a hug. It was a nice moral booster right when I needed it! |
 |
| Here's a look at the connector trail. For the first 1.5 miles, it travels through open meadows as it parallels the Kolob Reservoir Road to the south of the road. |
 |
| Another look at the Connector Trail with some prominent landmarks in the background, including West Temple in the far right of the picture. |
 |
| At one point, the Connector Trail crossed over a small dirt road which didn't appear on my map. |
 |
| The angle of the sun doesn't allow for the purple flowers to show up brightly in this picture but trust me, as a Vikings fan, I was proud to be hiking on this trail... |
 |
| After about 1.5 miles, the Connector Trail leaves the level open meadows in favor of a more forested ascent. |
 |
| Here's a look up the dry creek bed that was just crossed in the last picture... |
 |
| This is the Connector Trail in it's most overgrown area. It was still easy to find my way. |
 |
| Ready for some route finding? It's really not hard at all. |
 |
| Most of the short portion of the Connector Trail that is on the slick rock is either accentuated with big boulders on either side of the trail or marked with cairns. |
 |
| The Connector Trail had the most diverse terrain of all the trails. Here's a look at the trail after it climbed out of the slick rock. |
 |
| The view from the Connector Trail. |
 |
| Here's the portion of the Connector Trail where a series of tree falls has blocked the path. It really wasn't a difficult obstacle to climb over other than the fact I had already hiked 20 miles that day... |
 |
| Next, the Connector Trail passes through some lush, green ferns which creates a jungle-like feel. |
 |
Here's the sign marking the junction of the Connector Trail and the Wildcat Canyon Trail. This was at an elevation of 6920 feet after I had been hiking for 18 miles. I recognized the first .2 miles of this trail as it is the same route you take to do
the Subway. After .2 miles, the Northgate Peaks Trail leaves the Wildcat Canyon Trail to the right (south). That's the route to the Subway. To get to Lava Point though, continue straight on the Wildcat Canyon Trail. |
 |
| A look at the Wildcat Canyon Trail... |
 |
| ...and another look. For the first couple of miles, the Wildcat Canyon Trail gently ascends as it makes it's way to Wildcat Canyon. |
 |
| The Wildcat Canyon Trail with Russell Gulch to the right (East). Russell Gulch can easily be mistaken for Wildcat Canyon because of the bright white rock which lines the sides of both canyons. |
 |
| The trail then turns North and then back East again as it leaves Russell Gulch and nears Wildcat Canyon. |
 |
| This is a view of the gradual 400 foot vertical descent into Wildcat Canyon. The frustrating part was, again, knowing that at some point soon I would have to regain each and every vertical foot of elevation that I was currently losing. |
 |
| A look at the white walls of Wildcat Canyon as seen from the Wildcat Canyon Trail. |
 |
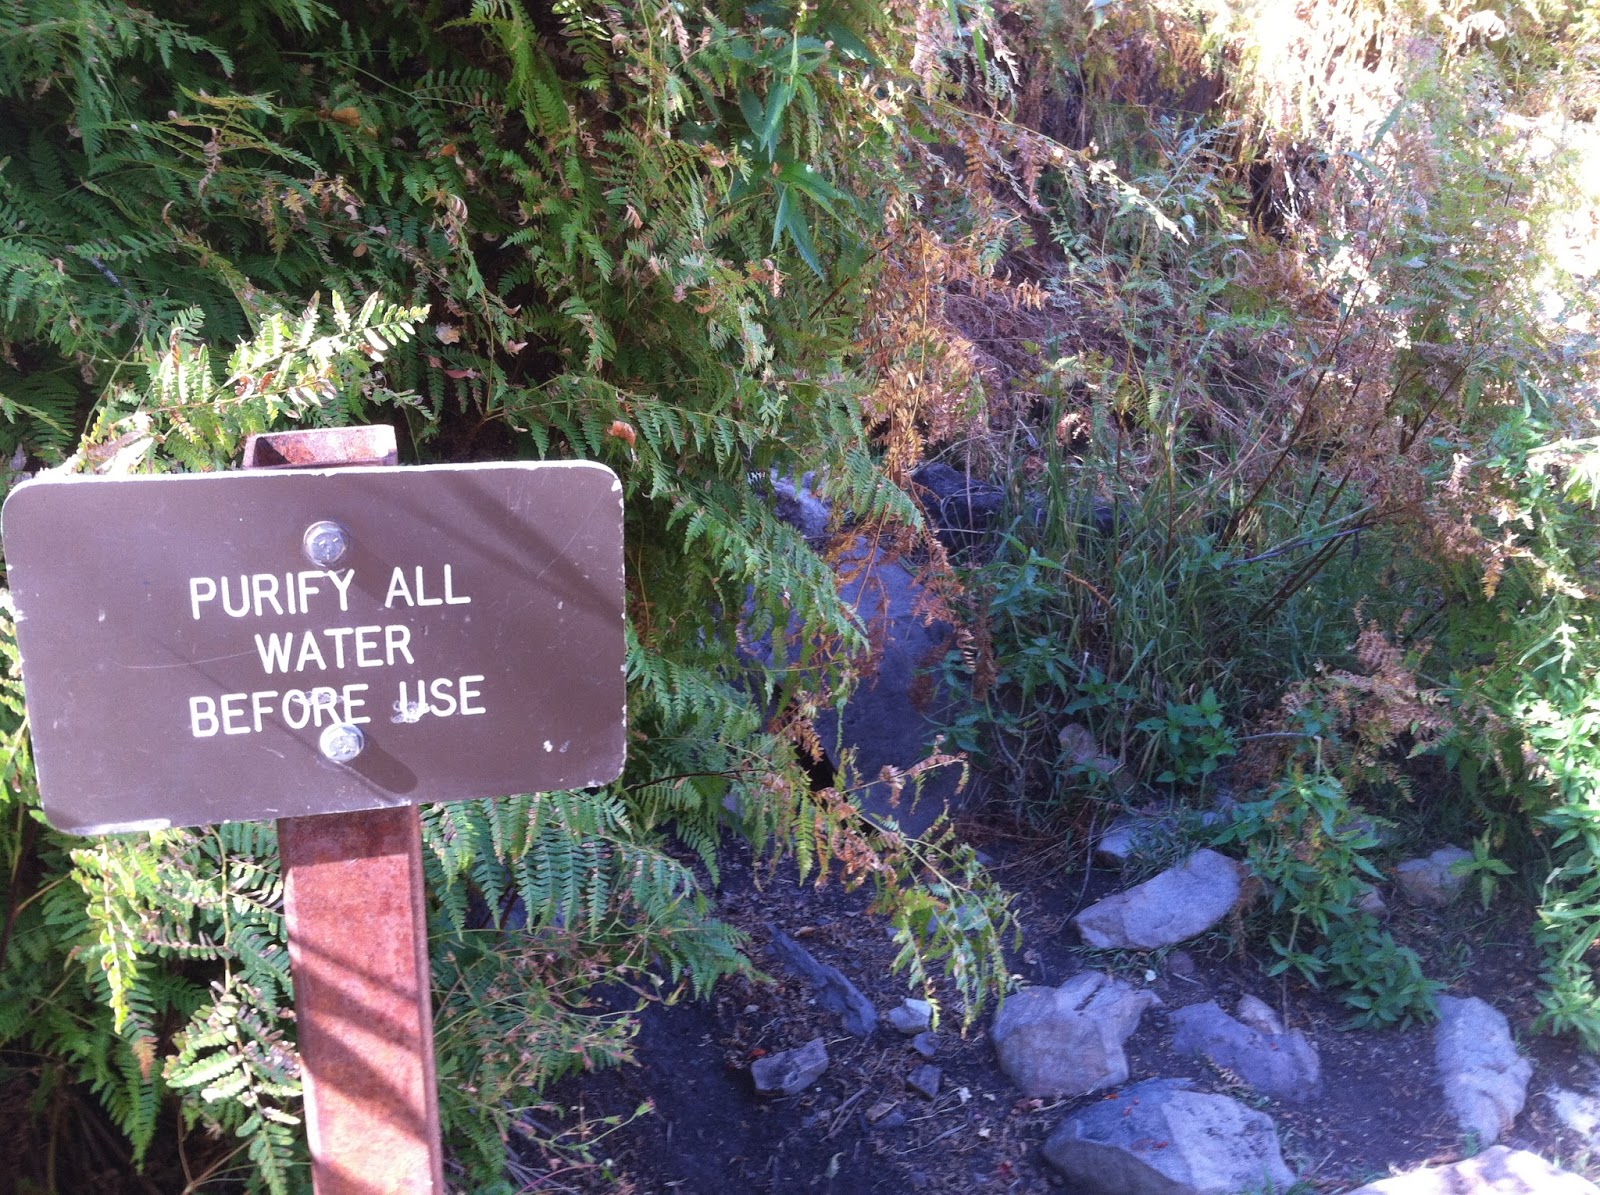
| Not too far before reaching Wildcat Canyon, a sign indicated that a spring must be near... |
 |
| ...despite the protest from my aching leg muscles, I did a little snooping around and found a little trickle under some rocks. |
 |
| At one point the trail actually descends into Wildcat Canyon as marked by the sign. The canyon here is shallow and very overgrown with trees and shrubs. |
 |
| And now, time for the ascent out of Wildcat Canyon. |
 |
| A faint trail left the Wildcat Canyon Trail and headed toward and past this relic out in a field. At first I thought it might be the way back to the West Rim Trailhead and Lava Point so I followed it for a short while. It looked like it came to an unofficial camp spot not marked with a sign or on my map. I returned to the Wildcat Canyon Trail and found that just a few steps later I would have seen the junction of the West Rim Trail. |
 |
| Here's the sign marking the junction. |
 |
| I headed up the trail for .1 mile until it reached the West Rim Trailhead. |
 |
| I took a picture of the West Rim Trail sign, not knowing for sure if I would have enough energy the next day to complete the final 13.5 miles. |
 |
| Here's the road that you must hike up if you want to camp at Lava Point. It is easy hiking on a normal day, but after a full day of hiking 20+ miles, it was about the last thing on my bucket list to do... The final mile to Lava Point gains 330 vertical feet. The first .7 of a mile takes place on this road. |
 |
| The last .3 of a mile takes place on Barney's trail which is marked by this sign and joins the road on the left-hand side. If you are hiking with your head down, it could be missed. The trail is well defined and climbs steeply up the hillside to finally bring you to the Lava Point Campground. |
 |
| This is where Barney's trail lets out in the Lava Point Campground - right next to campsite #2. I was so excited to get to camp where my family was waiting! |
 |
| After 10 hours and 19 minutes and 22.6 miles I encountered some happy campers roasting marshmallows back at camp. |
 |
| I hiked up an appetite! If I was to have any chance at finishing the hike the next day, I needed to get some food in me! |
 |
| The next morning Judi, my two year old, was happy to help serve hot chocolate. |
 |
| Back at it on day 2. When I woke up in the morning I was still so sore that I had decided not to finish the last 13.5 miles. But after a much needed pep-talk from my 16 year old, Alley, I decided to give it a go...or die trying! |
 |
| Now on the West Rim Trail, it starts off in a South-Southeasterly direction. |
 |
| Here's a look at the sign for campsite #9 at an elevation of 7344 feet. It would be the next best option to Lava Point if attempting to do the Trans-Zion hike in 2 days. This sign is about .9 miles from the West Rim Trailhead and then you must hike about .3 miles off the trail to get to the actual campsite. |
 |
| The West Rim Trail as it heads through a forested area just past campsite #9. |
 |
| The first views of the Great West Canyon at 3.18 miles from the West Rim Trailhead. |
 |
| Here's another look at the West Rim Trail as it nears Potato Hollow. |
 |
| Here's the sign for campsite #8 and Potato Hollow. It was here that I realized that my GPS had turned off due to low batteries. The good news was that I had back-up batteries. The bad news was that when I put them in my GPS I discovered that they were also dead. But never fear - I have back-up to my back-up batteries I keep in a dry-sack in case of an emergency. Unfortunately, I discovered that somehow moisture had gotten into my dry-sack and my back-up, back-up batteries were corroded. Oh well, I still had my phone to take pictures even though at this point it only had 8% power left... Back to the trail info, just past campsite 8, the trail heads south-west to campsite #7 before it begins a tedious 400 vertical foot ascent. |
 |
| Here is the Telephone Canyon Trail junction. In 2010 the Telephone Canyon Trail was closed due to a fire that had recently burned through the area, so I went the more scenic West Rim Trail Route, which adds an extra 1.4 miles onto your hike but gives you amazing views of the Great West Canyon. Because my legs were so sore and tired, and because I had never tried the Telephone Canyon Route, I decided to do it this time. The Telephone Canyon trail is 1.8 miles in length. |
 |
| The Telephone Canyon Trail with Zion Canyon in the background. |
 |
| Here's the Telephone Canyon trail as it passes by one of the leftover charred trees that still stands as a reminder of the fire. |
 |
| Though maybe not as scenic as the West Rim alternative, the Telephone Canyon Trail had great views of Zion Canyon (seen in the left of the photo above) as it got closer to it. |
Unfortunately, this is where my camera ran out of life. About a half mile past where the last picture above was taken, Telephone Canyon meets back up with the West Rim Trail. The trail then continues on through the most interesting and picturesque part of the entire hike - descending into Zion Canyon. I might go back to take pictures to add them to the blog - or maybe I'll let you discover the beauty first hand!
The next 2.9 miles of the hike descends at a fast pace down to Scout Lookout - best known for the flat area just before attempting the dicy section of Angels Landing. Once to Scout Lookout, any sence of solitude is gone as hundreds of people hike Angels Landing everyday. From here it is a 2.1 mile steep descent back to The Grotto trailhead where you can take the shuttle bus back to the Visitor's Center.
The link to my 2010 Trans-Zion hike can be found
here:


No comments:
Post a Comment