The Riggs Spring Loop Trail from Yovimpa Point to Rainbow Point is a moderately strenuous 8.8 mile hike with an elevation gain/loss of about 1600 feet. It can be done either way - from Yovimpa Point to Rainbow Point or vice-versa. Both Points are accessed by the same parking lot and are just a couple hundred yards away from each other so no shuttle car is necessary. The hike requires decent route finding skills as portions of the trail pass over dry washes that have completely erased the trail for up to 25 yards. In these spots the National Park Service has marked trees with small blue plastic squares that making staying on trail relatively easy until the trail is identifiable again.
Getting There:
I got to Bryce Canyon National Park from the town of Hurricane, Utah by going north on I15 until I got to Cedar City. Once there, I took Hwy 14 East for about 40 miles until it ends at Hwy 89. I went North (left) on Hwy 89 for about 20 miles until a sign indicated a turn off for Bryce Canyon on Hwy 12. I took Hwy 12 East (right) for about 13 miles until I came to Hwy 63. Hwy 63 heads south through the town of Bryce Canyon before reaching the National Park in just a few miles. The Riggs Spring Loop Trail is another 17 miles at the very end of the road through Bryce Canyon. Total drive time to get there for me from Hurricane, Utah was 2 hours and 45 minutes.
 |
| This is the parking area for Yovimpa/Rainbow Point. The Bryce Canyon Road actually dead ends into this parking area. This picture was taken right as you enter the parking area. The Yovimpa Trailhead is located just to the right of where this picture was taken. The Rainbow Point Trailhead is located at the far side of the parking area, which is at the center-left of this picture. |
The Hike:
 |
| The first part of the "trail" is paved with signs pointing the way to the actual trail. My GPS indicated that the elevation here was 9,145 feet. |
 |
| Here's a look at where the official Yovimpa Pass Trail leaves the paved walk way. The trail starts by paralleling the road you just came to the parking area on for the first hundred yards or so. |
 |
| The trail sign... |
 |
| Shortly after the trail leaves the side of the road, it ventures over to the edge of the cliff which offers spectacular views of the area below. If you can see the farthest orange cliff band in the distance, that's where you're headed. You'll be descending through that canyon with that cliff band on your right and hiking through the forested section below. |
 |
| Here's another look at the beautiful vistas! |
 |
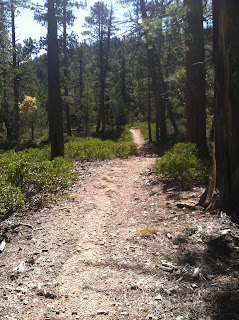
| Here's a look at the trail as it gradually descends under the rim of the Canyon. |
 |
| We had heavy rains for a couple of days prior to my hike so portions of the trail were still a bit muddy...and from the looks of things, I knew I wasn't alone out there...good thing I brought my bear spray to protect me from the predatory opossums... |
 |
| More of the scenery as seen from this portion of the Yovimpa Pass Trail... |
 |
| After 1.7 miles I came to this sign, indicating the Yovimpa Pass Campsite at an elevation of 8,407 feet. |
 |
| At the camp site, a sign indicates the direction of the Riggs Spring Trail, which is the trail to take. (there is also an unmarked 4-wheel drive track that leaves the campsite from the opposite direction). The Riggs Spring Trail starts descending rapidly after it leaves the camp site. |
 |
| Just passed Yovimpa Pass off to the left of the trail is a structure of some sort - possibly a small pump house? |
 |
| Remember that cliff band I pointed out a few pictures back? Well, here it is again, only much closer! And, instead of looking down on it, now I;m looking up at it! |
 |
| The trail continues on past a Bryce Canyon Wilderness sign, in case you forgot where you were... |
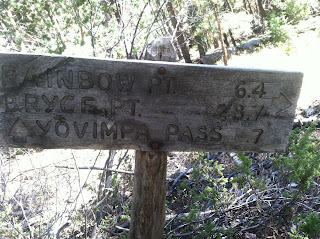 |
| Next I came to a sign that seemed a little out of place...there was no trail junction, it was just set in a pile of rocks to try to hold it up. One reason it seemed out of place was because it indicates that Yovimpa Pass is straight ahead .7 miles, but I just came from Yovimpa Pass which is off to the left of this picture. There is no trail at all that heads "straight" as the arrow indicates. Also, if you look closely at the background of the picture, no, the trees aren't growing at a 45° angle... |
 |
| ...there's the problem. |
 |
| October mornings can be rather cold at an elevation of 8,000 feet so even though much of the trail winded it's way through pine forests, the sun shining through the trees was a welcomed sight! |
 |
| After a quick 3.46 miles, I came to the Riggs Spring Campsite at an elevation of 7,547 feet. Here a VERY IMPORTANT bit of information - if you look closely at this picture, you will notice 2 signs. One is located on the right center of the picture, which indicated that this is the Riggs Spring Campground. The second sign is a little more off in the distance, in the center of this picture. It points to a "Riggs Spring group campsite." THERE IS NO SIGN INDICATING THE DIRECTION OF THE RIGGS SPRING LOOP TRAIL to take you back to the parking area. The faint trail heads north from the campsite at about a 90° angle from the trail that goes into the campsite. In the picture above the trail heads out of the campsite to the left side of the picture. At the time I was there in October 2016, there was a small cairn to mark the trail, but like I said before, the trail is faint as it leaves the campsite. |
 |
| The Riggs Spring is located in the center of this fencing. At first I thought it was just an old horse corral, but I heard a little trickle and upon further inspection... |
 |
| I saw the source of the trickle sound I heard - the Riggs Spring which was just a small trickle of water. |
 |
| Here's a look at the first sign, indicating the Campsite. |
 |
| And here's a look at the Group Campsite sign. |
 |
| Here's an important picture - This is a look at the Group Campsite sign from off to the right of the sign, looking in the direction of the unmarked Riggs Spring Trail - the trail you take to get back to where you started. The trail goes through the break in the logs off in the distance (left-center) of the picture. |
 |
| Here's a look at the unmarked Riggs Springs Trail as it leaves the Riggs Springs Campsite. You can see a small cairn on the right-hand side of the picture. Hopefully the Park Service puts a sign in here to help clarify the trail system. |
 |
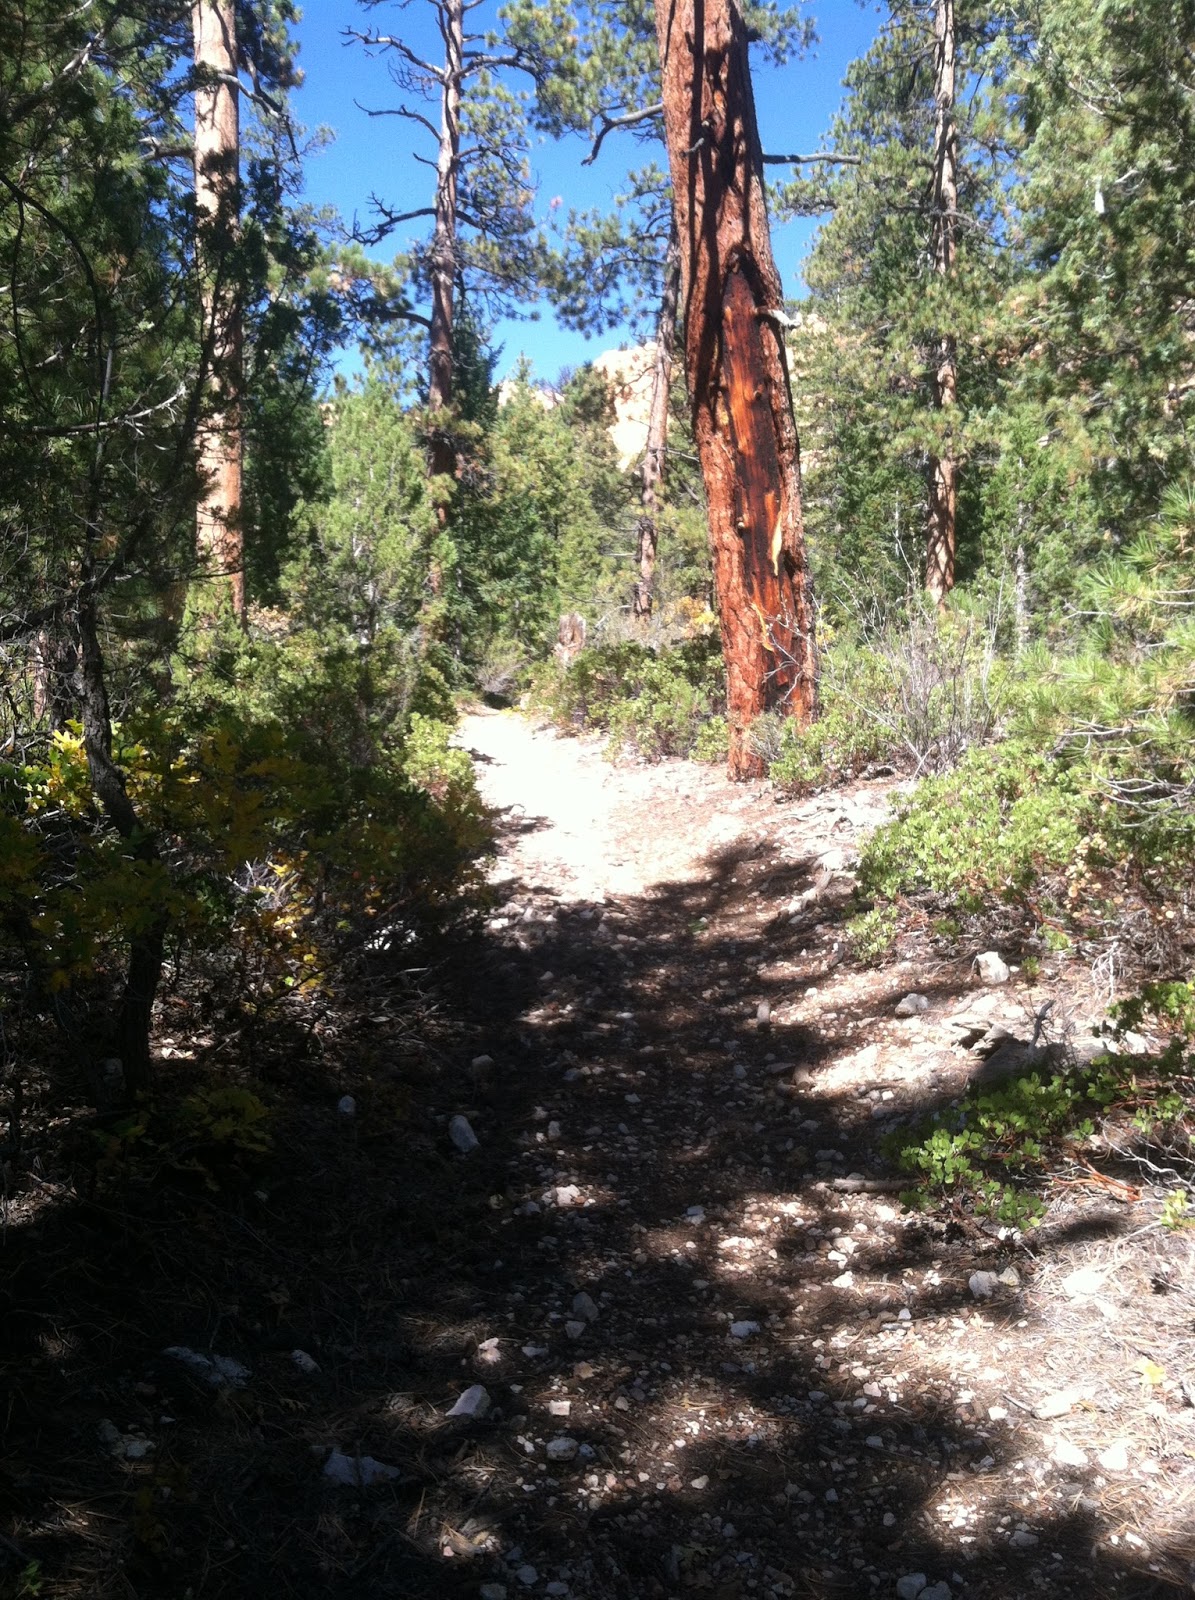
| Shortly after leaving the Riggs Spring Campsite, the trail becomes much more defined and starts ascending. |
 |
| I love the scenery at Bryce Canyon. The contrast of the yellow aspen leaves with the green pine trees, red rock walls, and blue sky never gets old. |
 |
| Here's one of the dry washes where flash flooding has removed all signs of the trail. If you enlarge this picture and look closely, you'll see a small blue square nailed to the larger tree in the left-center of the picture to indicate the direction of the trail. |
 |
| Here's another wash where the trail is non-existent except for a blue square hammered to a tree on the other side of the wash. There were about 4 of these washes throughout the hike. |
 |
| After 5 miles I came to the Corral Hollow Campsite at an elevation of 7,933 feet. |
 |
| Here's a look at the small campsite. |
 |
| As the trail leaves the Corral Hollow Campsite, it briefly ascends the western wall of Corral Hollow. |
 |
| Here's a look into Corral Hollow. After a brief .2 mile ascent from the campsite, you must now descend 100 feet down into Corral Hollow, and over to the other side. |
 |
| The trail in this section was slightly less defined, but easy to follow. |
 |
| You can see for miles and miles... |
 |
| ...and miles! |
 |
| The home stretch! Even though the elevation gain is over 1600 feet for the hike, it is spread out over a few miles, making the ascent manageable. |
 |
| Here's a look at the Under the Rim Trail junction after 8.38 miles and at an elevation of 8,920 feet. Signs clearly indicate how to get back to where you want to go... |
 |
| If you want to add another mile onto your hike, you can take the Bristlecone Loop which gives you views into the Four Corners area. Otherwise, follow the trail to Yovimpa point. |
 |
| Because Rainbow Point is so close to Yovimpa Point, you can actually return either way. Here's the sign pointing the way to Rainbow Point. |
The Riggs Springs Loop hike was a very picturesque hike which took me a total of 3 hours and 25 minutes to complete. I would recommend doing it in a counter-clockwise direction, from Yovimpa Point to Rainbow Point because I believe the trail is marked better that way, especially as it crosses the dry washes.
kgffg


No comments:
Post a Comment