 |
| Mount Kinesava |
Getting There:
The Mount Kinesava approach has changed over the past few years. Because of new housing developments and private property issues, the shorter approach has been abandoned and a slightly longer approach via the Chinle Trail is the most feasible way.
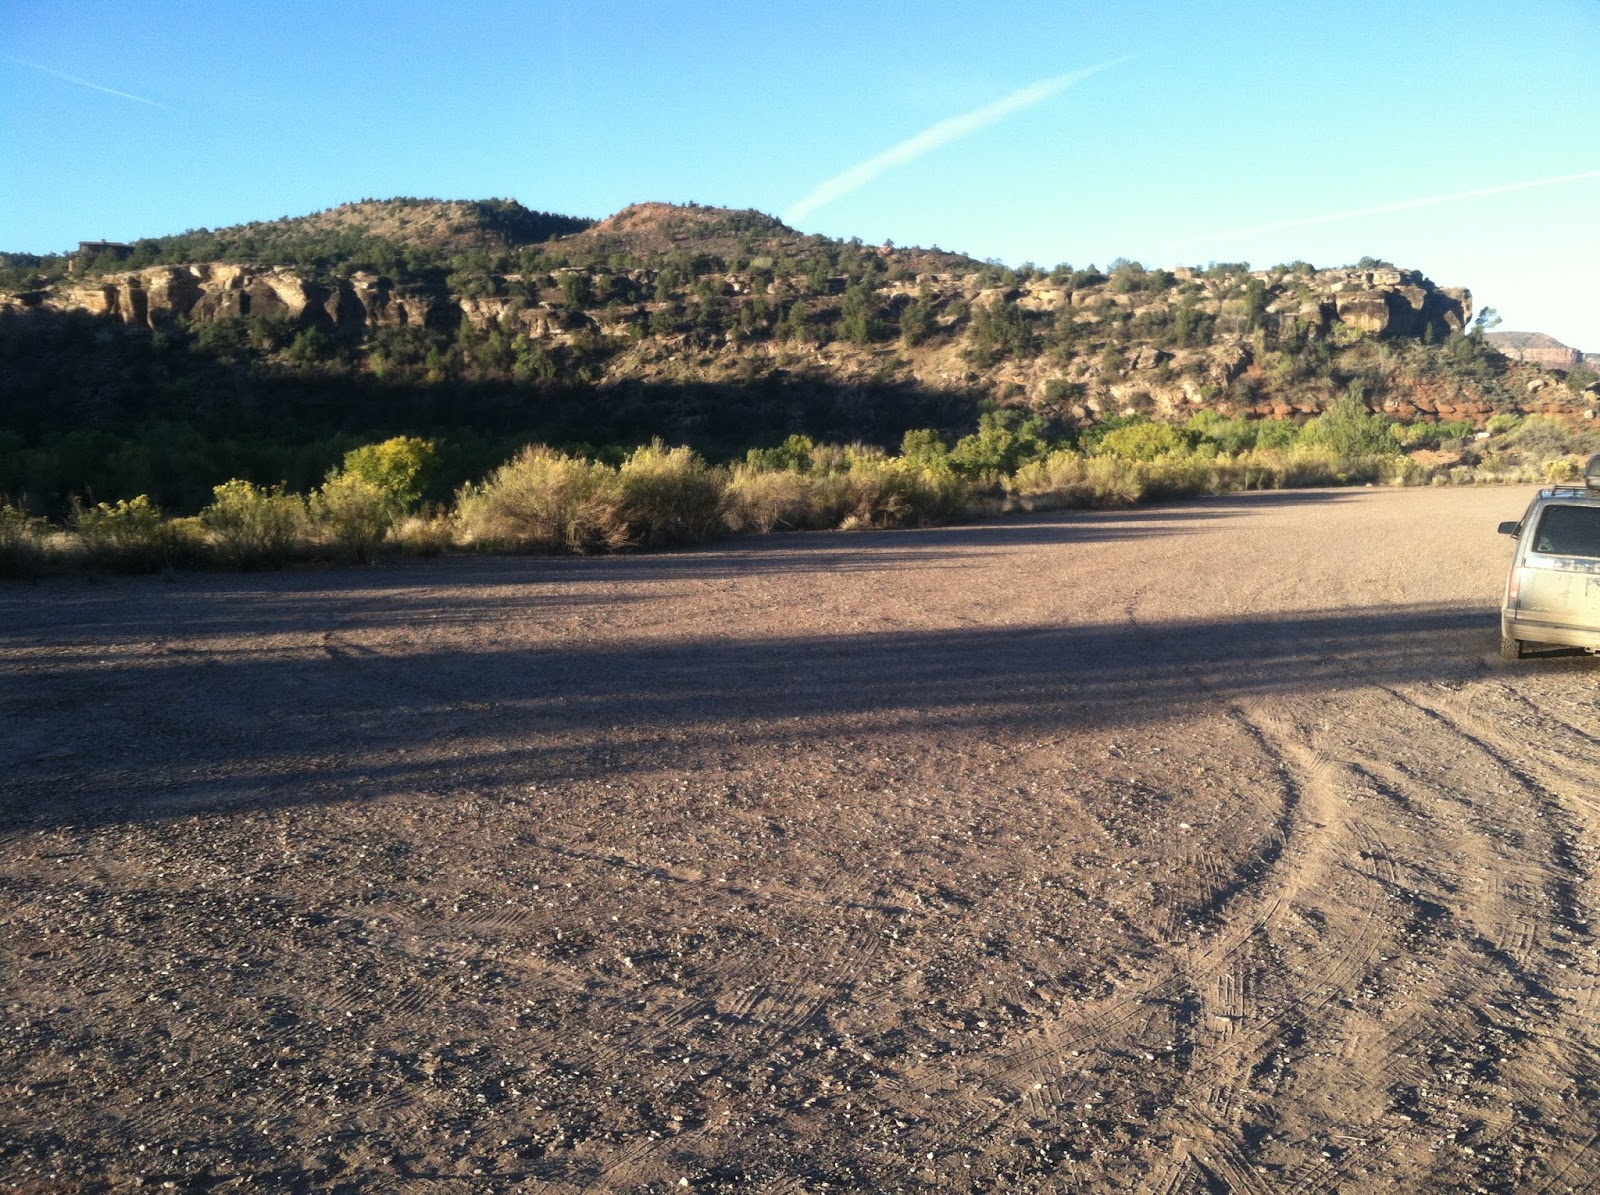
The Chinle Trailhead is located off of Anasazi Way just before reaching Springdale, Utah. Once on Anasazi Way, the trailhead parking is just a few hundred feet up the road and off on the right-hand side.
 |
| A look at Anasazi Way as it intersects SR 9 just before the town of Springdale (It's easy to miss). |
 |
| Here's the dirt parking area. |
Summary:
The Mount Kinesava hike is not one to be taken lightly. There is a short window during the year at which it should be attempted. Summer is brutally hot and during winter and early spring there is usually ice/snow on the treacherous climbing sections. The best times to attempt the hike/climb are late spring after all snow and ice are gone, and early fall before the days get too short. Also, plan on wearing pants on the hike no matter how hot it is so that your legs get LESS torn up by the bushes and cactus.
Although the hike is only 8.54 miles, there is 3,391 feet of elevation gain and loss which makes the hike very physically demanding. Required are good route finding skills as, after the first mile, there isn't much of a trail to speak of and good climbing skills. Be warned that there are about 4 spots of class 4 climbing (where a fall probably won't result in a fatality - although you might wish it had...). Those spots, while only 8-12 feet high, can present a challenge to those with little climbing experience.
The adventure starts on the Chinle Trail which winds through a residential area before taking you to the Zion National Park boundary gate. Once through the boundary gate, you'll leave the trail and follow the fence line to the right in an easterly direction. Although the route is fairly obvious, from here on out don't count on any sort of a trail even though there may be an occasional cairn or slight use trail. The fence will take you across 3 small washes before it climbs up a ridge. You can take the ridge that the fence climbs up on, but that will add a little distance and elevation gain/loss to the hike. I recommend hiking north through the sage brush to the smaller ridge right before the one the fence takes you to.
Either ridge will take you to a large power pole with power lines running above it. Head for the power pole and up the ridge behind it, which is the only feasible way up to the next plateau since the rest of the plateau is guarded by cliffs.
Once to the top of the plateau, head for the base of Kinesava. Again, there is no trail so just pick the easiest way through the boulders, juniper trees, sage brush, and cacti that try to block the way. Once to the base of the Kinesava, the steady class 3 (with a few previously mentioned sections of class 4) climbing begins. You will be tested in this part. I had to back track on a few different occasions to try to find an "easier" climb, sometimes to no avail. The rocks are loose and sandy. Be sure to test them out before putting all your weight on them. At one point I didn't and almost paid for it...
Once to the top, two prominent white peaks will come into view. The one on the left is Kinesava. Just to the left (west) of Kinesava are a few cliff panels where the petroglyphs are located. The final 500 foot climb up to the summit of Kinesava is primarily class 3 depending on the route you take (it can be much harder). Once to the summit, you will enjoy amazing views of Springdale and Rockville to the south, Zion Canyon to the east, West Temple to the north, and The Great West Canyon to the West.
The hike took me 7 hours and 5 minutes to complete including 30 minutes trying to find the petroglyphs and 20 minutes on the summit.
Once last word of advice before getting to the pictures: as you reach the top of each ridge line, take a moment to look around you and try to identify some prominent feature that will help you return back to that spot on your descent. It is very easy to get lost. Something that helped me was knowing that I needed to head toward
Eagle Crags, off in the distance, on my descent.
 |
| Here's an overall idea of what the route looks like. I've added the red line to indicate the approximate line of travel. You can click on the image to enlarge it if needed. |
The Hike in Pictures:
 |
| Here's a look at the trailhead sign, located at the north end of the parking area at an elevation of 3,868 feet. I started the hike at 8:30 while the sun was still low in the sky, thus my shadow. |
 |
| The beginning of the trail. |
 |
| The first half mile of the trail parallels Anasazi Way as it winds its way through the residential neighborhood. This picture was taken as the trail drops briefly into a wash. |
 |
| The trail also crosses the road at one point and then is signed (as seen in this picture) on the opposite side. |
 |
| The trail eventually leaves the residential area and heads toward the Zion National Park Boundary fence, In the very center of this picture is a coyote. He's just to the right of the large Juniper bush, slightly behind a sage brush. He ran across the trail about 30 yards in front of me and I was able to grab my phone and get this picture before he completely disappeared. |
 |
| Here's a look at the Zion National Park Boundary gate and fence which is about 1 mile from the trailhead. Once through the gate, leave the trail and follow the fence line to the right before leaving it to head north toward the ridge. |
 |
| This picture is looking east along the fence line - the direction you will be heading. You can take the ridge you see in the distance and head left on it toward Kinesava, but I recommend leaving the fence line before that ridge and hiking cross country through sage and cactus to the smaller ridge just before that one (which is not seen in this picture, but further to the left). |
 |
| Here's a close-up of the first ridge with Mt Kinesava in the background. At times there is a faint use trail on the very top of the ridge which makes travelling a little bit easier. |
 |
| I thought this was an intriguing look at Kinesava with a small window in the rock to the right. |
 |
| This is the view you'll see as you reach the top of the first ridge. From here you'll descend slightly to the power pole, pass underneath it,and then head for the ridge you see in the center of the picture in between the cliff bands. The power lines are 2.1 miles from the trailhead at an elevation of 4,460 feet. |
 |
| Here's a look at a portion of the ascent on the second ridge that takes you through the cliff bands. This ridge was much steeper that the first ridge with many more loose rocks and sand. |
 |
| This is what you'll see when you reach the top of the second ridge (elevation 5,070 feet). From here, head towards the base of Kinesava. |
 |
| Getting closer...If you look closely, you can see the route you are forced to take to get to the top of rocks - Start at the base of Kinesava and make an ascending traverse/climb to the right. |
 |
| Now even closer to the base, keep heading towards it before beginning the climb. Right at the base (3.25 miles from the trailhead at an elevation of 6,000 feet), I cached my trekking poles which were very useful on the hike up over the loose sand/rocks, and would prove to be useful on the way down as well, but would have been a hindrance further up as I needed both hands free to climb. |
 |
| Let the climbing begin... |
 |
| This was one of the three or four class 4 climbing obstacles. You can see that it's only about 10 to 12 feet, but it was still intimidating for me. When I got to this point, I began to wonder if I had gotten myself in over my head. |
 |
| After a short jaunt through some scratchy bushes and a trip on "the cat walk," it's time for some more climbing! |
 |
| Here's a look at "The Cat Walk." If you look to the bottom center of the picture, you will see a line of green bushes. They are hugging the side of the cat walk. When I was doing my research on this hike before attempting it, there was a great big deal made of this portion because of the "exposure." I frankly found the three or four class 4 climbs MUCH more terrifying than the cat walk. There is a drop of maybe 30 feet off to the right but the ledge itself is wide enough to not cause concern - maybe 2 feet. |
 |
| Here's an up-close look at the cat walk. |
 |
| Here's another difficult climb - especially getting down it... |
 |
| When you finish the climbing section and reach the top, here is what you see. The peak on the left is Mount Kinesava. This point is 3.8 miles from the trailhead at an elevation of 6,772 feet. To reach the summit, head toward the saddle between the two peaks and begin the class 3 climb of the final 500 vertical feet. |
 |
| As on most of the hike, there is no trail up to the summit, so pick your poison. But pick it carefully otherwise you might have to back track to avoid class 4-5 climbs, as I did! |
 |
| From the summit (elevation 7,285) looking south at the town of Springdale. |
 |
| Looking east at East Temple and into Zion Canyon. |
 |
| Looking north at West Temple. |
 |
| Looking west at the Great West Canyon. |
 |
| Remember, what goes up must come down! Although elevation is always difficult to convey through pictures, down climbing steep portions such as this were very difficult. |
 |
| This is back in the wash near the residential area. After a long day of hiking, I almost missed the exit point of the wash to pick the trail back up. Good thing someone made an arrow out of rocks to point to it! |
The Petroglyphs:
One of the inspiring thoughts about the petroglyphs found near Mt Kinesava is the knowledge that not many people have ever seen them due to the difficulty of the journey to get there. Unfortunately due to erosion, they might not be around for too much longer. Here's a look at the petroglyphs in pictures and how to find them:
 |
| Although hidden behind scrub oak trees, the petroglyphs are relatively easy to find if you know where to look for them. Here's a picture of Mount Kinesava. Just to the left (south west) of Kinesava is a cliff band, seen in this picture. This is where the petroglyphs are. |
 |
| Here's a closer look at the petroglyph panel... |
 |
| ...and an even closer look. |
 |
| As mentioned above, scrub oak really blocks easy access to the petroglyphs. But once you fight your way through the brush, you are treated to this... |
 |
| Here's a slightly closer look at the picture above |
 |
| And another look, this time from a vertical camera perspective. |
 |
| Here's a different section, with a few close-ups to follow: |
 |
| Here's another section from a couple of different angles... |
 |
| This section was just to the left of the first picture I posted with the people in it. You can see that there was a significantly more to this on the left side of the picture that has been lost due to erosion. |
 |
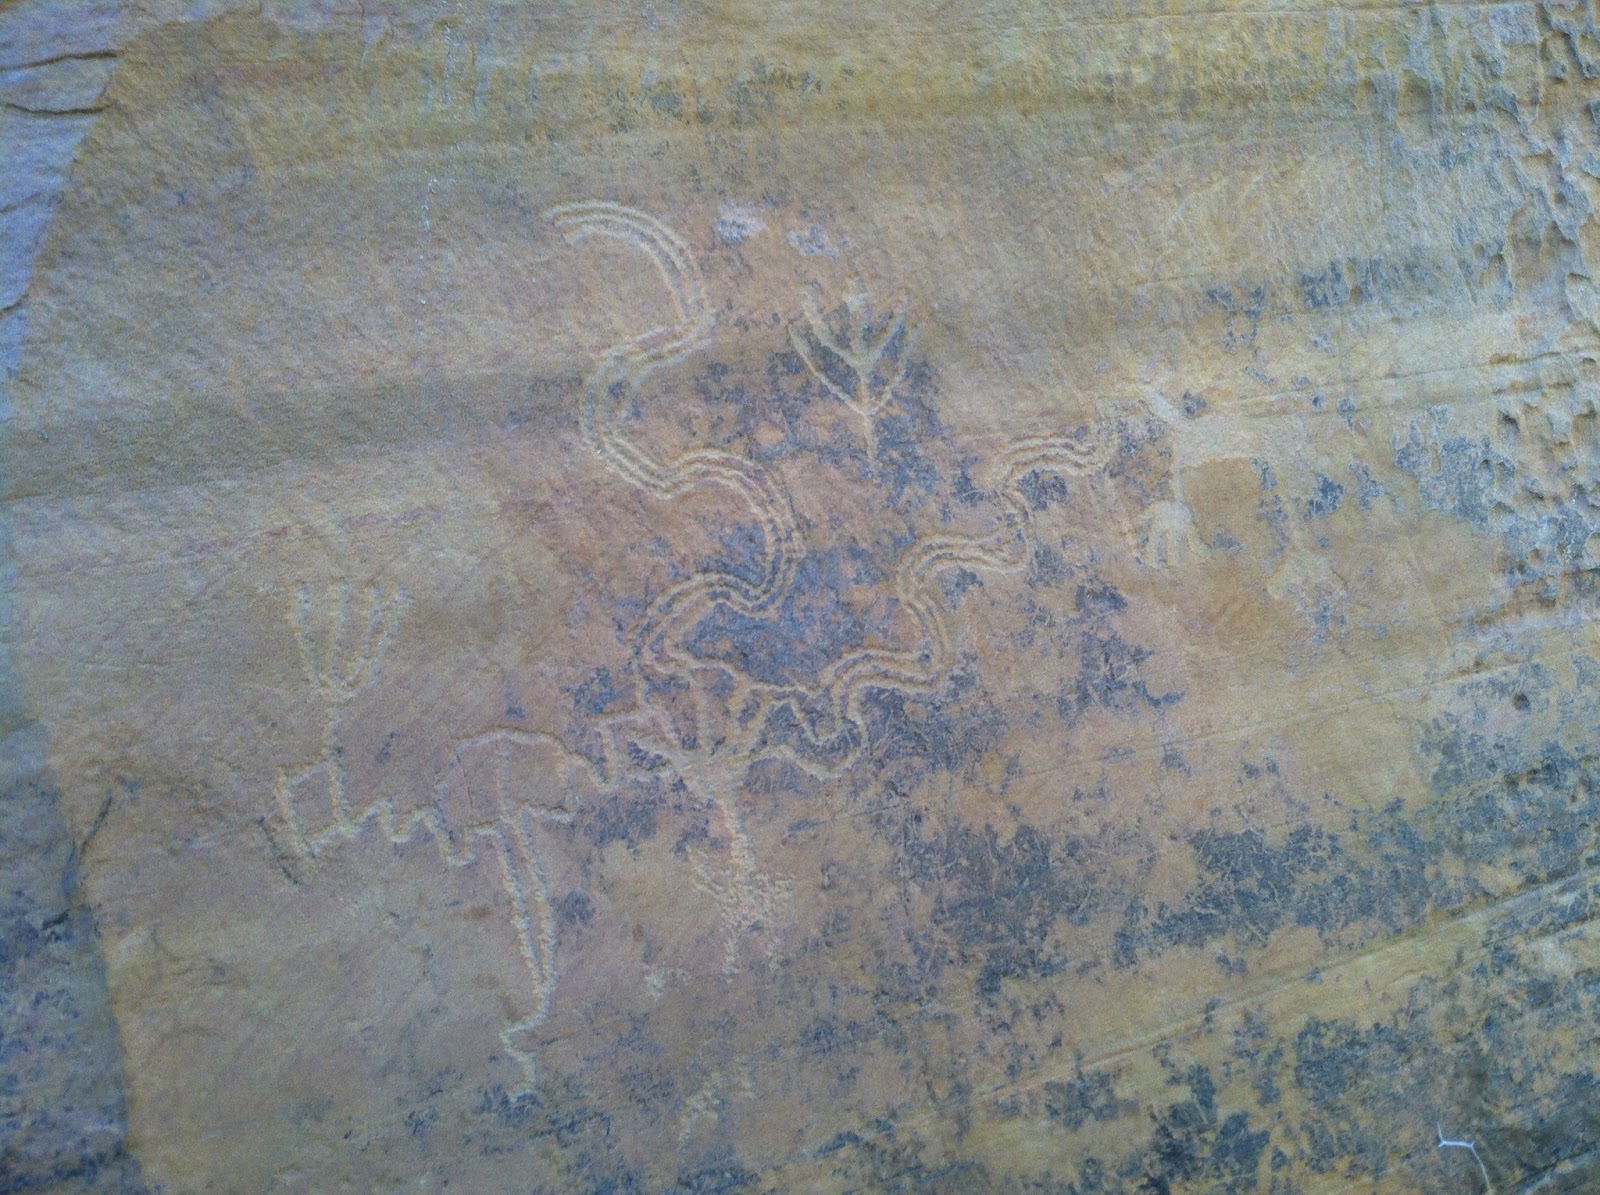
| I actually missed this one with just my naked eye but I could see it as I scanned the rock through my camera. |
 |
| Another faint image off by itself. |


Yo, Just wanted to let you know this has been the most helpful and descriptive (at least in lay-terms) route guide that I've found for this hike thus far. Many thank yous, good person!
ReplyDeleteThanks!
Delete